Herb Roasted Turkey, Brined and Spatchcocked
*Check the bottom of post for updates*
In 2009 for Thanksgiving I made a turkey that was in line with most of the food trends these days, meaning it was coated completely in bacon. It was the first time I ever actually cooked a whole turkey and it went very well. I used a technique called “spatchcocking” where you cut out the spine of the turkey and basically butterfly its entire body and allow the turkey to lay somewhat flat and by doing this it decreases the cooking time. The final touch before throwing it in the oven was to strategically lay several packages of apple-wood smoked bacon under the skin of the bird allowing for some pretty moist and flavorful meat.
Well, now that you know a bit about my history with making a turkey on Thanksgiving, I’ll tell you about the method I’ve been doing since 2010 and has really stepped up my turkey game.
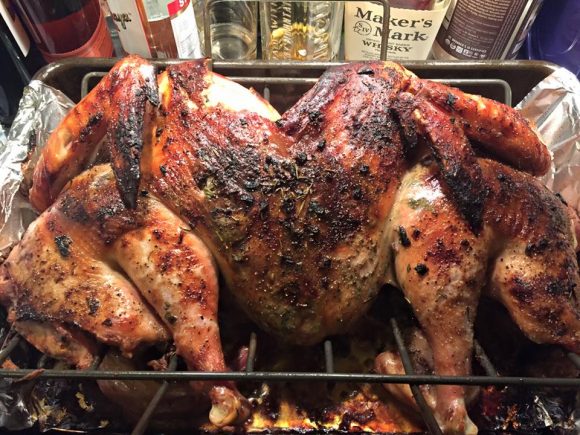
The Finished Turkey (1st Version with Butter stuffing)
I decided to change it up a few years back and have been doing this ever since. So I browsed all around the internet and decided on doing a brine, and then making an herbal butter bacon spread to put under the skin.
Here are all of the things I used to complete my bird:
Brine Ingredients:
- 1 cup kosher salt
- 1/2 cup light brown sugar
- 1 tablespoon cracked black peppers
- 1 handful of WHOLE rosemary at least
- 1 handful of WHOLE thyme at least
- 1 handful of WHOLE sage leaves at least
- 1 gallon of water, or enough water to cover the bird while brining
- Brining bag and a bucket
Turkey and Rub Ingredients:
- 13 lb Thawed Turkey(or any size, just adjust cooking time appropriately)
- 1 handful of rosemary at least
- 1 handful of thyme at least
- 1 handful of sage leaves at least
- 1 finely chopped onion
- 1 tsp lemon pepper
- 6 cloves of crushed and chopped garlic
- 2-4 cups of Turkey Stock (for adding to the bottom of the roasting pan)
- 1 package of chopped bacon instead of butter/margarine for my under skin stuffing.
Optional to toss in the pan to cook in turkey juices:
- Carrots
- Onions
- Brussel Sprouts
- Garlic
Brining the Turkey:
1. Pour the gallon of water in a pot on medium to low heat.
2. Add in the kosher salt, brown sugar, all of the herbs for the brine and let the flavors begin to blend as the water warms up. When the salt and sugar are completely dissolved turn off the heat.
All the Brine seasonings, and half the water
3. Add some ice cubes and/or more cold water to the pot to get the temperature down if you are not in the mood to wait for it to cool.
4. While the water is cooling, prepare your brine bag and bucket to hold the bird. I ended up using a turkey cooking bag, actual I used 2 bags to make sure it wasn’t going to leak, instead of a brining bag. I also added some ice to get the water cooling faster and cold water. When the water is cold and not warm at all, place the turkey in the brining bag and inside the bucket.
Turkey, soaking in the brine
5. Take your pot of water and pour it all in the bag over the turkey, inside the turkey(keeping the neck or gizzards in is up to you, I took mine out) until the turkey is completely submerged. Then press out all of the air from the bag and tie off the bag to keep it sealed tight. PLACE IN THE REFRIGERATOR. I let my turkey soak from Tuesday night, to Thursday morning, so nearly 48 hours. You can do it overnight, or I think up to 72 hours, from what I’ve read online.
6. When you are ready to cook, drain out all of the water from the brine and remove all the loose herbs from the brined turkey.
Taking the turkey out of the brine
7. Preheat your oven to 400 degrees.
8. While the oven is warming up, you can begin spatchcocking your bird. To do this place your turkey on a sturdy surface, counter, etc, or even in your roasting pan on the counter(That’s how I did it). I found that it held the turkey in place better for me to do my cutting.
Turkey in the pan, ready for spatchcocking
9. Some people have cooking sheers, or poultry scissors, but in my case I used a very sharp filet knife. The kind you find at fishing tackle stores. Starting at either side of the spine, from the neck down, begin to cut the bone. Be very careful if you are using a knife. It can be done, it’s just a little more tough and you need to push very hard. Find a strong person to help you with that part.
Cutting out the spine
10. Once you have the spine cut down both sides, pull it out and remove it.
What a spineless turkey…
11. Set the spine aside and make sure to include this in the bottom of the roasting pan. The spine will cook in the juices and be delicious!. Spread the turkey out as much as you can while it’s on it’s breast side down.
Spread the body out as best you can
12. After you have the turkey spread out as much as you can, flip it over, and place the palm of your hand on the inside of each breast near the center and press down firmly. You’ll hear a loud pop and the turkey will fall flatter on the surface. Repeat this for both sides. Then you can position the leg and thighs to lay how you need them to in your pan. I did mine like this:
Press down on the breasts and spread it out flat
13. Now your turkey is ready for the rub. Put the chopped bacon (you may precook it if you like or raw) margarine in a bowl and smash it up. Break up the herbs and add them to the bowl with the margarine chopped bacon!, avoid stems. Add the onion, lemon pepper and garlic as well. Mix it all up as best you can until it becomes one solid mold-able mass.
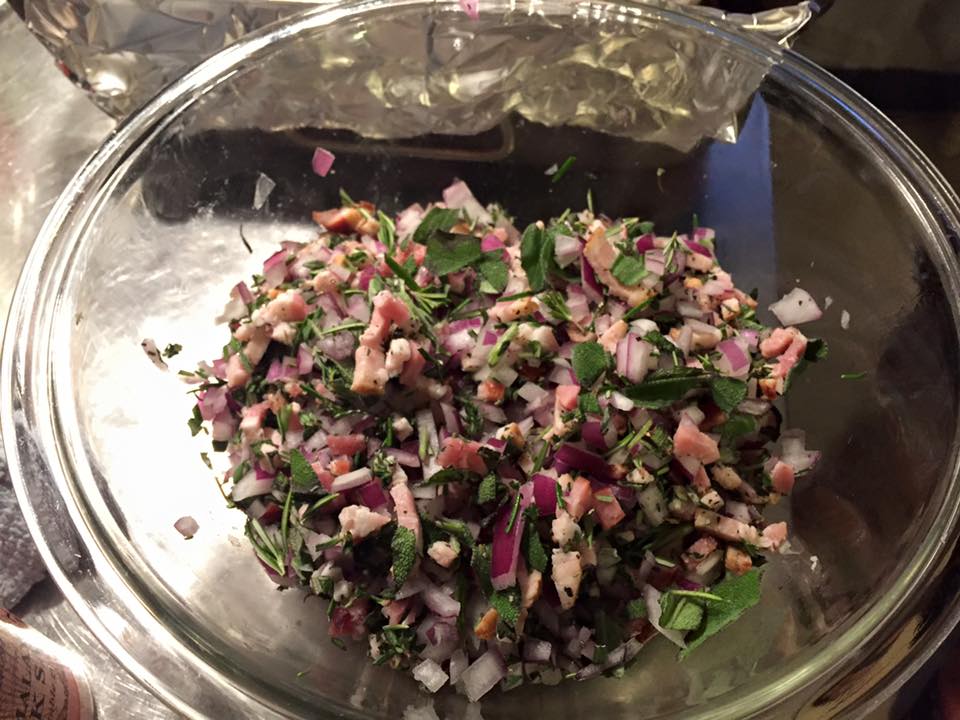
Bacon and Herb Skin Stuffing (NEW WAY!)
OLD WAY – The herb margarine spread
14. Pull the turkey skin back as careful as you can, not just on the breast, but also on the thigh and legs.
Loosening up the skin
15. When the skin is loose, insert large chunks of your margarine/butter mixture under the skin and press it as flat and even throughout the turkey as you can.
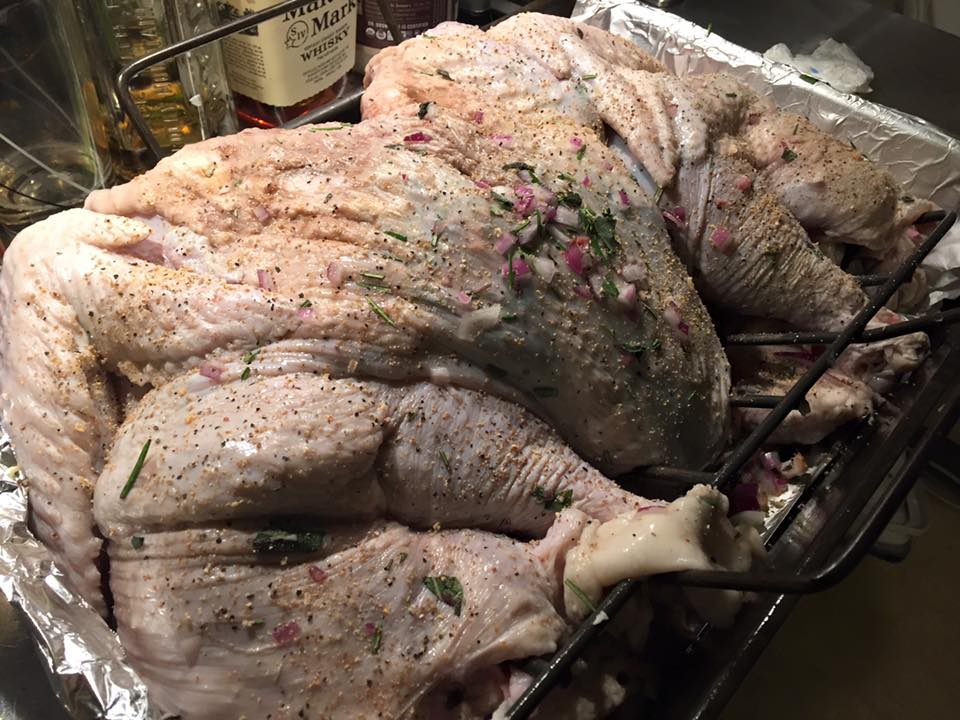
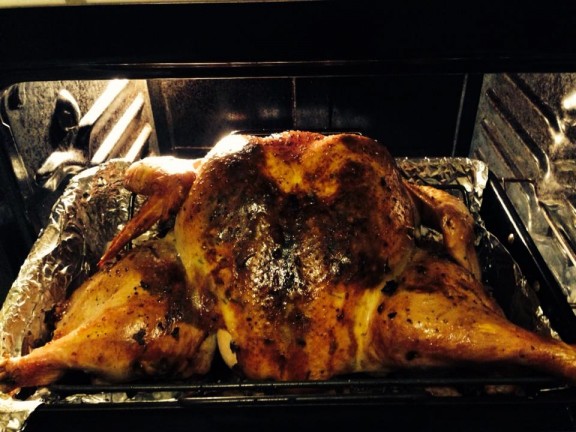
2015 update with Bacon and Herb under skin
Turkey skin all stuffed with margarine herb spread
16. After you have all the mixture tucked under the skin, pull it back over the meat and as tight as you can. At this point you can add in your extra turkey stock to the bottom of the pan. This will allow for simpler basting.
17. Place the turkey, uncovered in the oven for about an hour. You can baste it if you like. I did baste mine after 20 minutes and then again at 40 minutes.
18. Cook the turkey until you get a nice golden brown skin crisp and the inner thigh meat reaches a temperature of 160 degrees. I think my turkey wound up cooking for about an hour and 45 minutes. I also changed from a regular oven to a convection setting about 3/4 of the way through. I CANNOT STRESS ENOUGH that you should monitor the temperature as a gauge for when your turkey is done. Do not go strictly by time.
When the bird was done and ready to cut, I had a bit of a rough time with carving it. I’m not a great carver, but I managed to plate some and keep it looking pretty good.
One thing I do recommend is cutting off the breasts as full and complete as you can with the skin on and the herbs in place and then slice it side to side in short slices and not in long flat slices you normally see on Thanksgiving. Like this:
The final product, sliced up
***UPDATES***
I’ve been doing this recipe and method for the last 3 Thanksgivings. I love it.
This year, 2013, we did it again. This time I brined a 19 lb turkey for 2 days. I baked it at 350 for 2.5 hours solid. I did 2 bastes throughout the process. I also omitted the butter in the underskin filling and used a little bit of olive oil instead. This turned out to be the best one yet!
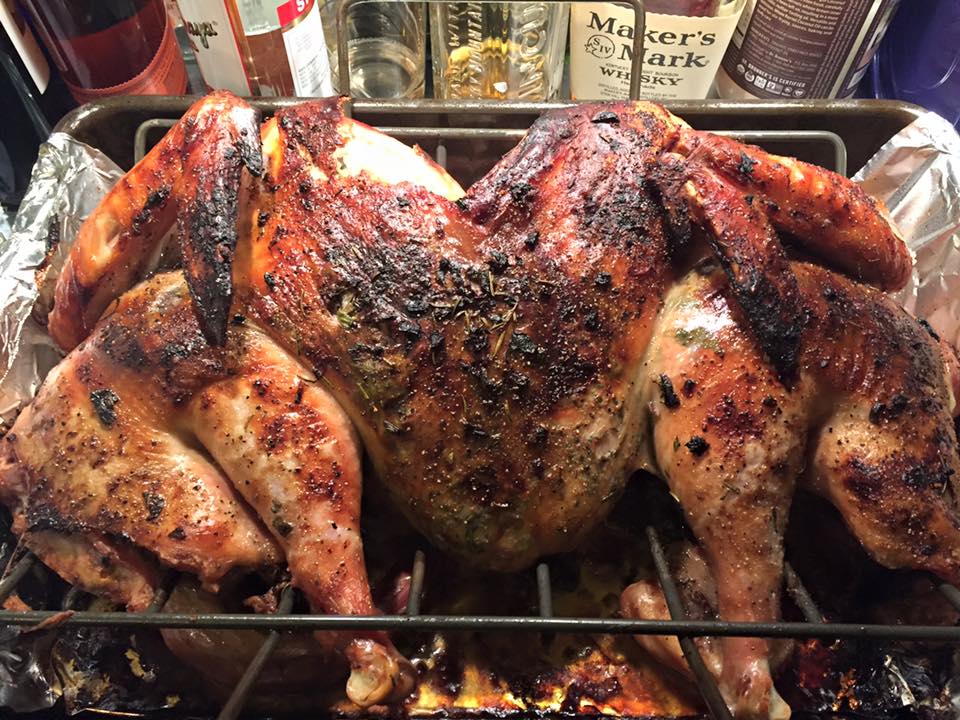
2015 Bird
13 Responses to Herb Roasted Turkey, Brined and Spatchcocked
You must log in to post a comment.
Recent Posts
- Easy Pumpkin Spice Cookies – 3 Ingredient
- Chicken Fajitas
- Norcal Foodies Instant Pot Tortilla Chicken Soup
- Norcal Foodies Instant Pot Beef Stew
- Eggs in an Egg Blanket – Poached Eggs Inside an Omelette
- Bacon and Egg Breakfast Cups – Gluten Free, Dairy Free
- Bacon Wrapped Jalapenos Stuffed with Gluten-Free Non-Dairy Cream Cheese
- Southern American Succotash Soup with Chicken
- Pork and Beef Meatloaf
- Slow Cooked BBQ Chicken
Norcalfoodies Archives
Recipe and Cooking Sites
Tags
avocado bacon beef bell peppers Black Beans Breakfast butter Celery chicken Chocolate Cilantro corn Cumin dinner Eggplant egg whites Fingerling Potatoes Garbanzo Beans Garlic gluten free green beans kale Mexican food Milk mozzarella norcalfoodies Olive Oil onion onions Parsley pesto Potatoes ravioli Red Onion rice slow cooker soup soyrizo thyme tomato tomatoes tomato sauce vegetable box vegetarian Zucchini



This turkey looks so crunchy and it is sure more healthy than the bacon wrapped one.
Katerina, it was seriously the most moist and flavorful breastmeat I’ve ever eaten. The brine and herbs were so present in every bite.
At one point, to really review and analyze it, I cut off a small cube of meat and made sure there was no skin, no other seasonings and just slowly chewed and examined it, to determine how good it was. And yes, it was the best I’ve ever had. I think the brine was the key here.
Thanks for the comment.
In step 17, did you mean; “You can BASTE it if you want” instead of “brine” it? Gonna try your recipe tomorrow. Brining for 24 hours. Is that enough time?
Wende, great catch! That’s correct, I meant to say baste instead of brine. I think 24 hours is just fine. I’m actually going to make this again tomorrow as well. I’m going to start brining it around 6pm, then we are headed down to Southern California with the turkey in the cooler.
I would love to hear how it turns out for you. Take pics and have a great Thanksgiving!
I am making your turkey today but I brimed since Tuesday in wine it is delicious. A quick question for how long did you cook your turkey? Elise
Elis,
I did the turkey again on Thursday and went about 90 minutes total, for my 15 pound bird.
Thanks!
That looks damn good. More Nor Cal Foodies.
Dear Mack,
Thanks for the great photos, and the very handy advice. I made this turkey yesterday, and it was a big hit with everyone at the table. Surprising, I was able to carve out the spine with a small, sharp paring knife, with no help from any “strong” person. To keep the juices and bone from spattering and contaminating other foods, I thoroughly cleaned my kitchen sink, and did all the spine removal and “flattening” right there. It was a snap to clean and disinfect afterwards!
Thanks for all the great tips, we will be enjoying this turkey for years to come.
Brown Family
Wow Thanks for the note Laranda. That sounds like you got it figured out. Doing it all in the sink is a smart move. My apartment sink is a bit small, I wound up doing it in the roasting pan this year.
Thank you for stopping in!
2018 Thanksgiving….here we go! thanks mack!
Glad it went well Wally!
I used your recipe for the brine this year for my first spatchcock turkey. I did a version of your herb butter under the skin! I will forever be brining and spatchcocking my bird as this was the best turkey ever! Everyone at the table agreed that it was the best turkey they ever had. Thank you for the recipe!
Wow Marilyn that is so great to hear! This year I did the under skin stuffing with bacon again and cooked the bacon a bit longer than in the past. I enjoyed it that way. I also did a light dusting of corn starch over the skin and then sprayed it with oil to help it crisp up. That worked great.